Homemade Arduino Controlled Servo
Even though one can easily buy hobby servos online, I thought I'd have a go at making, and programming, one with some spare parts I had laying around to see how they tick.
In its simplest form a servo is an electric motor with an encoder or potentiometer attached to the motor's shaft to measure its rotational angle. A microcontroller is used to to control the rotation speed and direction of the motor's shaft until its position matches a predefined angle as measured by the potentiometer.
Parts list
- LEGO (great for quick prototyping without screws or glue)
- A 5000Ohm potentiometer
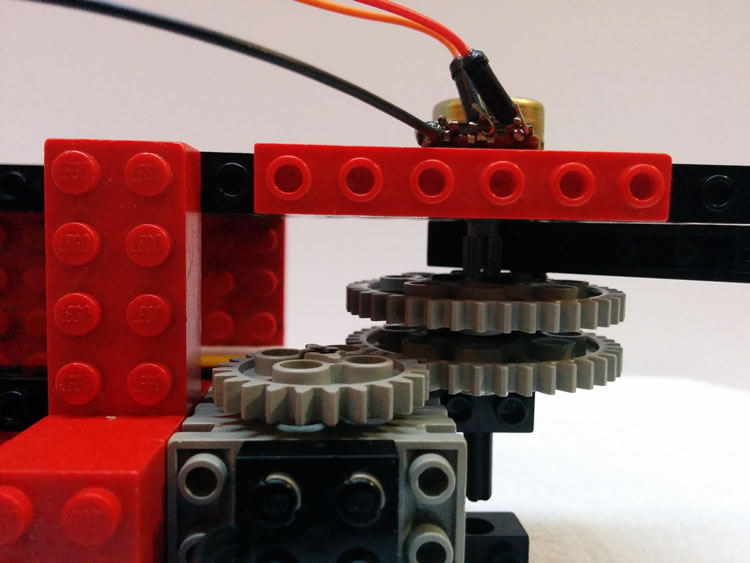
- An old LEGO Mindstorms electric motor and gears
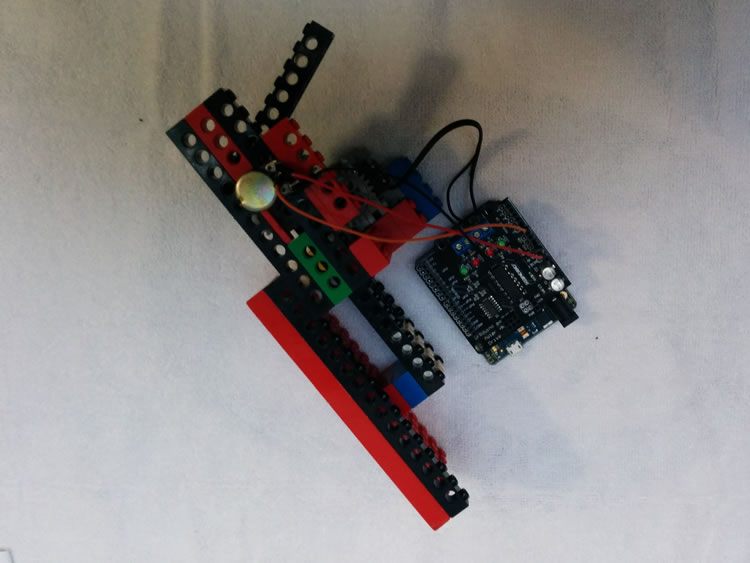
- An Arduino Uno R3 with 1 Amp motor shield (any Arduino compatible board will work)
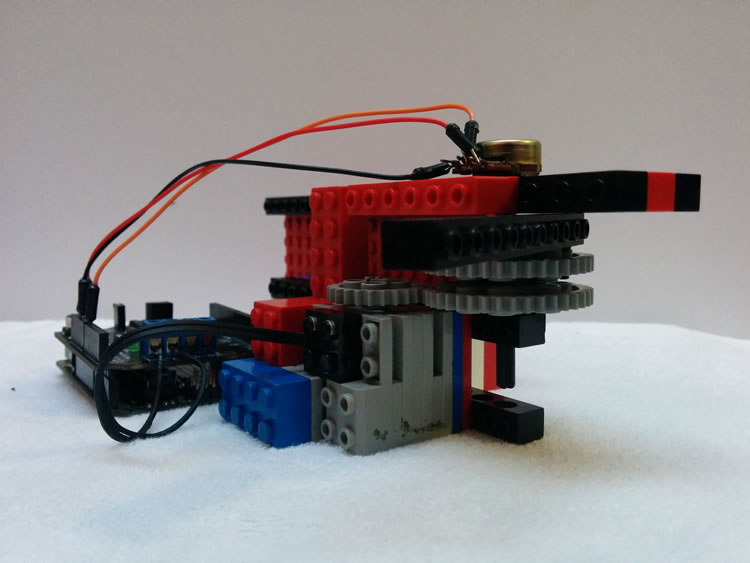
The rig
As shown in the pictures below building the rig was considerable easy, but it's not particularly strong or precise.
Programming
The Arduino code is straightforward, it follows these steps:
- Sets a required angle that needs to be reached by the motor.
- Measures the potentiometer's current angle and if it's not the same as required angle turns the motor forward or backward based on whether the current angle is below or above the required angle.
- When the required angle is reached it stops the motor.
/*
  The circuit:
  * Potentiometer attached to analog input 0
  * center pin of the potentiometer to the analog pin
  * one side pin (either one) to ground
  * the other side pin to +5V
  * Motor attached to motor 1 connector on shield

  Created by Peter Wallhead

  This example code is in the public domain.

*/

//Assign motor shield pins that start and stop the motor.
int PWM1 = 5;
int PWM2 = 6;

//Assign motor shield pins that dictate motor direction.
int DIR1 = 4;
int DIR2 = 7;

//Set motor rotation speed (max: 255)
int rotationSpeed = 255;

int rotorPin = A0;            // select the input pin for the potentiometer
int controlPin = A1;          // select the input pin for the potentiometer
int rotorValue = 0;           // variable to store the value coming from the potentiometer
int rotationDegrees = 0;      // defaulted here, but is created by mapping rotorValue to a value between 0-270
int requiredPosition = 135;   // initial position the motor should turn to

void setup() {
  Serial.begin(9600);
}

void loop() {
  // read the value from the potentiometer
  rotorValue = analogRead(rotorPin);
  rotationDegrees = map(rotorValue, 0, 1023, 0, 270);
  Serial.print(requiredPosition);
  Serial.print("\t ");
  Serial.println(rotationDegrees);

  if(rotationDegrees != requiredPosition) {
    if(rotationDegrees > requiredPosition) {
      digitalWrite(DIR1, LOW);
      analogWrite(PWM1, rotationSpeed);
    }

    if(rotationDegrees < requiredPosition) {
      digitalWrite(DIR1, HIGH);
      analogWrite(PWM1, rotationSpeed);
    }
  } else {
    analogWrite(PWM1, 0);

  }

  // read value from pot 20 times per second
  delay(50);

}
Problems encountered
- The motor I chose to work with is not designed to work at slow speed and so getting it to turn to, and stop in, a precise position was very hard.
- The problem caused by the motor's high speed was that it kept overshooting the mark, turning backwards too far, and then turning forward too far again. I did try increasing the speed of the Arduino loop to counter this but it still caused the the motor to rapidly switch directions (hunting) and never stop at the exact required angle.
- Because the rig was quickly assembled it allowed the potentiometer to shift in its mounting which made measuring the shaft's rotation harder and also caused the rod connected to the gears to jam in the housing on more than one occasion.
Possible improvements and future work
- Obviously the simplest solution would be to buy a real servo, but that would defeat the purpose ;)
- Use a slower speed motor or a slow speed gearmotor so that the shaft angle could be read more easily by the potentiometer and prevent the motor of overshooting the mark.
- Build a sturdier rig to hold the components which will assist in more accurate angle readings.
This is the first of many Arduino projects I'll be blogging about so stay tuned and feel free to try out some of my code from my GitHub repo.