Simple Ultrasonic Obstacle Avoidance
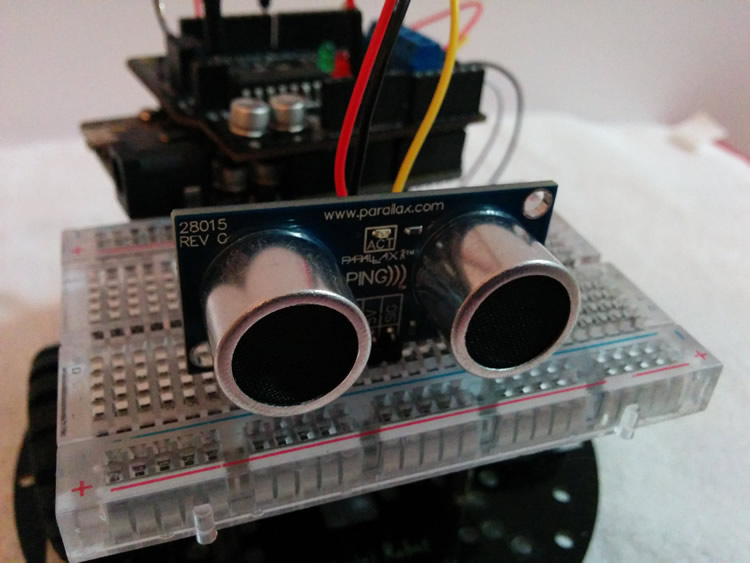
Inspired by an article by John Boxall for Little Bird Electronics I recently bought myself a Parallax Ping))) Ultrasonic Distance Sensor to try out. This great little sensor can measure distances between ~2cm and ~3m in length.
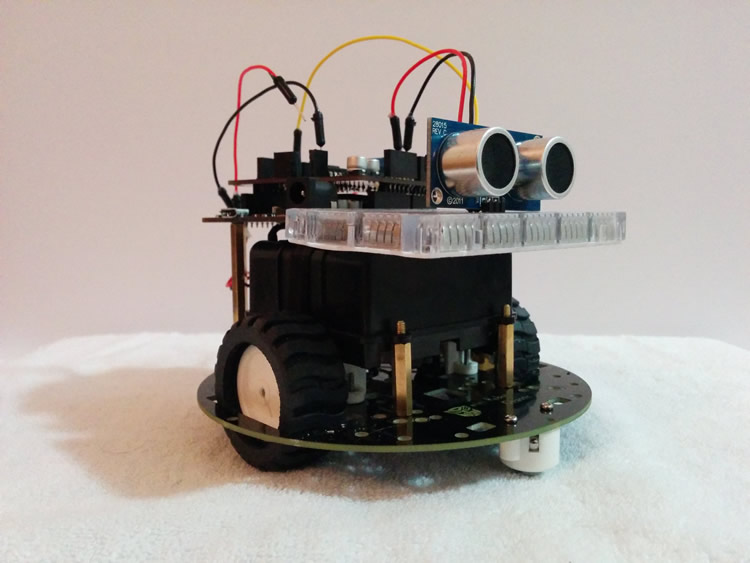
Having already purchased a motor base previously I decided to have a go at making a basic roving platform that could avoid obstacles in its path.
Parts list
- A Parallax Ping))) Ultrasonic Distance Sensor (source)
- A 2WD miniQ Robot Chassis (source)
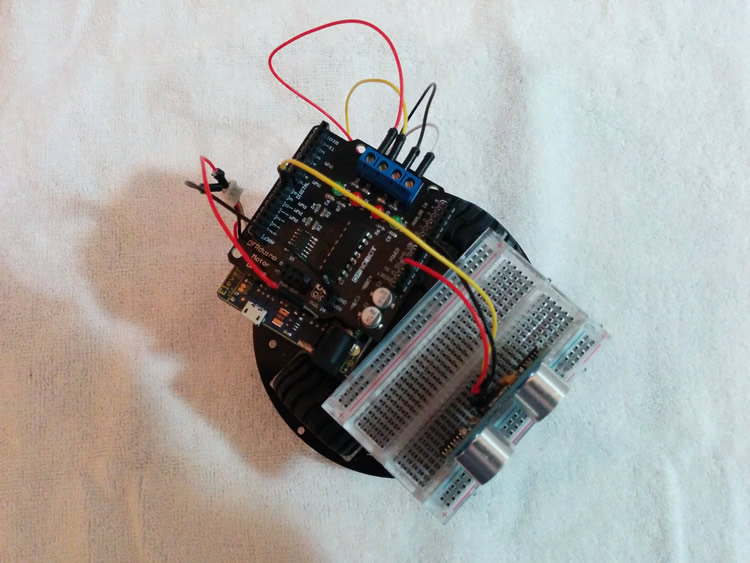
- An Arduino Uno R3 with 1 Amp motor shield (any Arduino compatible board will work)
- Spare switchable 6/12V battery case
- Assorted spaces, screws and wires
The rig
Bonus video
Programming
The Arduino code makes the robot follow these steps:
- Drive forward until an obstacle is detected less than 30cm away from the Ping))) sensor.
- Drive backward for a set time and then turn left a small amount.
- Continue driving forward again.
/*
  Parallax Ping))) ultrasonic sensor code from tronixstuff.wordpress.com - CC by-sa-nc
  http://littlebirdelectronics.com.au/blogs/news/4724922-tutorial-parallax-ping-ultrasonic-sensor
  Connect Ping))) signal pin to Arduino digital 8

  Motor shield control functions added by Peter Wallhead.

  This example code is in the public domain.

*/

int signal=8;
int distance;
unsigned long pulseduration=0;

// Assign motor shield pins that start and stop the motor.
int PWM1 = 5;
int PWM2 = 6;

// Assign motor shield pins that dictate motor direction.
int DIR1 = 4;
int DIR2 = 7;

// Set default motor speed.
int SPEED = 130;

void setup()
{
  pinMode(signal, OUTPUT);
  Serial.begin(9600);

  // Set pin modes to output for all those used by the motor shield.
  int i;
  for(i=4; i<=7; i++) {
      pinMode(i, OUTPUT);
  }

}

void measureDistance()
{
  // Set pin as output so we can send a pulse.
  pinMode(signal, OUTPUT);

  // Set output to LOW.
  digitalWrite(signal, LOW);
  delayMicroseconds(5);

  // Now send the 5uS pulse out to activate Ping)))
  digitalWrite(signal, HIGH);
  delayMicroseconds(5);
  digitalWrite(signal, LOW);

  // Now we need to change the digital pin
  // to input to read the incoming pulse.
  pinMode(signal, INPUT);

  // Finally, measure the length of the incoming pulse.
  pulseduration=pulseIn(signal, HIGH);
}

void loop()
{
  // Get the raw measurement data from Ping)))
  measureDistance();

  // Divide the pulse length by half.
  pulseduration=pulseduration/2;

  // Now convert to centimetres. We're metric here people...
  distance = int(pulseduration/29);

  // Display on serial monitor (not required, but handy for calibration).
  Serial.print("Distance - ");
  Serial.print(distance);
  Serial.println(" cm");

  // Measure distance in front of sensor to nearest object
  // while driving forward in a straight line.
  if(distance > 30) {
    forward(100);
  } else { // If distance is less than 30cm then reverse up and turn away.
    backward(500);
    left(180);
  }

  delay(50);
}

void forward(int di) {
  analogWrite(PWM1,SPEED);
  analogWrite(PWM2, SPEED);

  digitalWrite(DIR1, HIGH);
  digitalWrite(DIR2, HIGH);
  delay(di);
}

void backward(int di) {
  analogWrite(PWM1,SPEED);
  analogWrite(PWM2, SPEED);

  digitalWrite(DIR1, LOW);
  digitalWrite(DIR2, LOW);
  delay(di);
}

void left(int de) {
  int turn_length;
  turn_length = de / 2;

  analogWrite(PWM1,SPEED);
  analogWrite(PWM2,SPEED);

  digitalWrite(DIR1, HIGH);
  digitalWrite(DIR2, LOW);
  delay(turn_length);
}

void right(int de) {
  int turn_length;
  turn_length = de / 2;

  analogWrite(PWM1,SPEED);
  analogWrite(PWM2, SPEED);

  digitalWrite(DIR1, LOW);
  digitalWrite(DIR2, HIGH);
  delay(turn_length);
}

void pause(int ti) {
  analogWrite(PWM1, 0);
  analogWrite(PWM2, 0);

  digitalWrite(DIR1, HIGH);
  digitalWrite(DIR2, HIGH);
  delay(ti);
}
This is one of many Arduino projects I'll be blogging about so stay tuned and feel free to try out some of my code from my GitHub repo.